Before I talk about the best home inspector website hosting package, let’s talk about what you need. Really it’s easy but if you get in a rush, you could forget one of the most important steps. That is coming up with an online “Branded Username“. After you find your Branded Username then you need to buy a domain. OK, let’s get back to it.
Well, one more thing. While you need website hosting, you should also know why & what it is. In the digital world, if you look at your domain as the street address for your website. The land that your house sits on, is your hosting. Then, of course, your website is your house. So if you don’t have land, you can’t have a house. Or in this case, without hosting, no website.
Website hosting can be explained as a service that stores the files of your website so when people go to your domain, your domain will point them to the server at your hosting company. Then the power of technology takes over and displays all those pictures and crazy behind-the-scenes code as a beautifully designed website.
OK, this time I’m serious, back to it…
Initially, as a designer, I had launched “HostYak.com”. HostYak is basically a “White Labeled” Domain & Hosting platform powered by one of the most well-known companies in the space, GoDaddy. For years, this was my go-to for website hosting. But as I was finishing the home inspector website template, I found some initial minor issues that quickly escalated to me having to pull MY websites from MY hosting company.
I said that to say this.
I spent over 40 hours doing research to find the absolute best home inspector website hosting package. Obviously, there are some amazing Managed WordPress exclusive packages that can be exactly what an inspector needs. But, I said the absolute best, and I took performance & ease of use into consideration.
After landing on Cloudways, I took advantage of their THREE (3) DAY FREE TRIAL to put it to work. (& YES I SAID FREE 3 DAY TRIAL. For hosting companies, that is a huge deal. To me, that told me that they were willing to show people that they could help by actually helping people) After I realized how amazingly fast the backend was (about 20 minutes) I automatically upgraded to the paid account.
***SAVE SOME MONEY WITH A COUPON CODE*** After seeing how awesome it was I spent some time and finally was able to get through to who I needed to in order to get a coupon code for you all. So be sure to use the coupon code “saevusx” at checkout & get 10% OFF for the first 3 months! This also tracks who I’ve referred & I will receive compensation at NO ADDITIONAL COST TO YOU.
I built out a couple of home inspector websites on a server to test page speed as well as some other very large pages to truly test the speed & optimization of the page.
The largest test was over 30 full-size images (not optimized) and over 8,000 words of content. Easily one of the largest pieces of content I’ve ever put together, I was expecting the page to load in about six (6) seconds (if I was lucky). The entire page loaded in under two (2) seconds. That quick? and THAT FAST, I WAS SOLD!!
Before I go any deeper into Cloudways I want to say one thing.
If you just want the cheapest hosting, you can sign up for Managed WordPress Hosting with HostYak for about $13/month. It will host the website, but like most other hosting companies, it is not as fast as a website should be for an amazing home inspector. Once again, I’m telling you who to use instead of using MY COMPANY. I hope that you are paying attention to the hints.
Best Home Inspector Website Hosting Company
With Cloudways you get all the amazing benefits of servers from companies like Amazon S3 & VULTR, without having to write code or manually install software for your website. Along with “server-side optimization” and a bunch of other perks, Cloudways is easily the best home inspector website hosting company you can choose. (DISCLAIMER: This is my opinion and that being said, you should always do your own research.)
***If you are using the Home Inspector Website Template, I can’t force you to use a specific hosting company. But if you want all the benefits of the template, then using Cloudways is basically the required home inspector website hosting choice.
How To Sign Up For Hosting
Before you can build a website, you have to have hosting. So we are going to get started setting up a Cloudways account. <–Click The Link To Get Started!
As you land on the homepage, you’ll need to click on either the “START FREE” or “GET STARTED FREE” button.

You will land on a sign-up form. Go ahead and fill that out. It will ask for your first name, last name, and email address. Then you will need to put in your password. (This gains access to your website, so make sure you have a strong password.)
The next two options are drop-down selection boxes. For the “I would best describe myself as”, we’re going to use “Other Businesses”. Then inside of the “My monthly hosting spending is”, we’ll select “$0-$50”.
Then you need to click on the text “Got a Promo Code?”. This will open the box to enter in your promo code. Put it in as you see it below.
saevusx
This will get you 10% off for your first 3 months.
Then you will need to agree to the Terms of Service & Privacy Policy. (We are NOT attorneys, you should always read anything that you agree to online & YOU SHOULD ALWAYS SEEK LEGAL COUNSEL WHEN NEEDED)
Now click on the “START FREE” button.
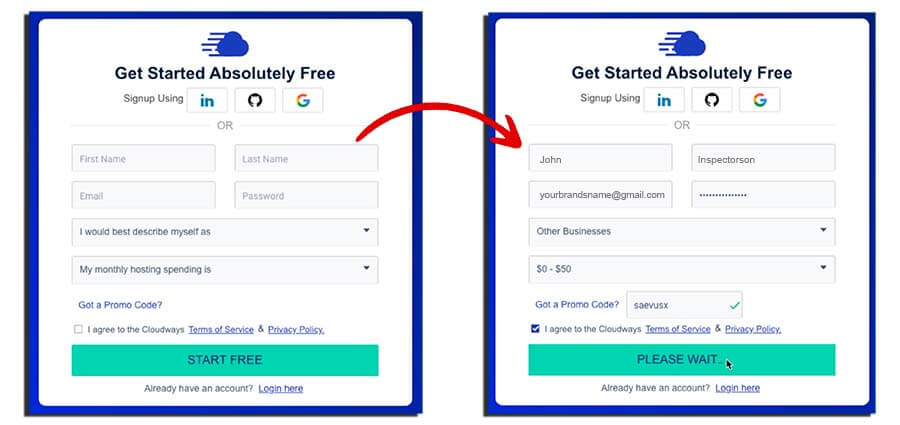
After you start your website hosting account, it will take you to the “Deploy Your Managed Application” page. DO NOT FILL ANYTHING OUT YET!
Before we can set up our server or install WordPress, we have to “Verify” the account.
Just like we did when we registered our domain, we’re going to go to Gmail and look for the verification email. The subject line is something like this: “Activate Your Cloudways Account”.

Once you open the email, you’ll need to click on “Activate Account”.
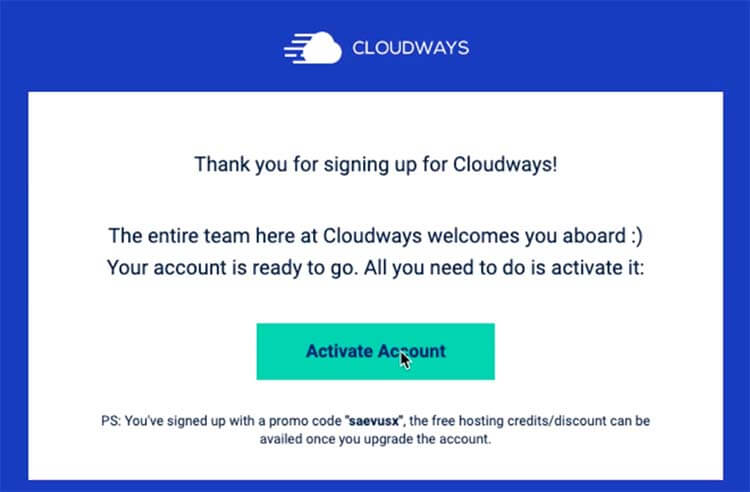
This will take you to the first step in verifying your account. In order for the sign-up to go through you will need to complete this step. Enter in your mobile number (must be an actual number, VoIP & Skype phone numbers WILL NOT work) Once you enter your number, click on Send SMS.

This is going to send you a text message with a 6 digit code to verify your phone number.
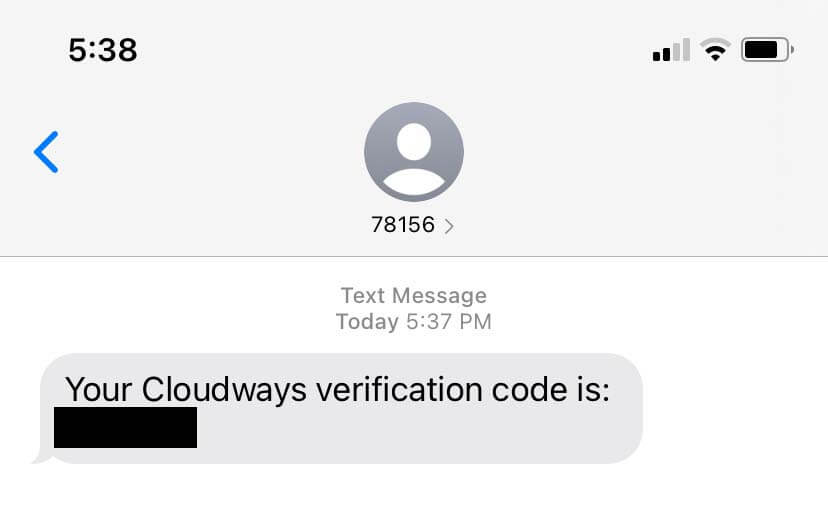
Enter that code into the next page and click on “VERIFY”.

After you click on “VERIFY” it will take a few seconds and completely verify you in the system with both your phone number, and email address. Once it is finished verifying and you’re verified, you will see the success screen. It will only show for about 10 seconds then it redirects you.
But you should know this will happen so you don’t think you missed something if you read a text message or something else in the first few seconds and don’t get a chance to see what the window says.

The next step is THE MOST IMPORTANT STEP! SO PLEASE PAY ATTENTION.
OK, so the next thing that we are going to do is set up our server and get WordPress installed.
In order to get to the right location, click on “Servers” in the header.

This will take you to the “Server Launch” page to access the settings to set up your server & install WordPress.
All you have to do here is click on “LAUNCH NOW”
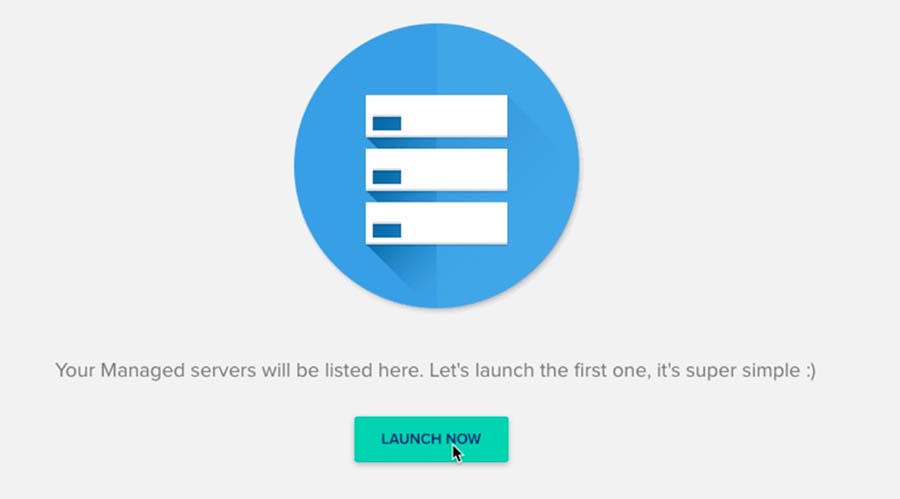
Once you click on “LAUNCH NOW” it will redirect you to the set up page. It will automatically open up a pop-up to welcome you to Cloudways. You can click on “Let’s Get Started” or simply use the X to close out the popup.

Now is the time to get everything set up right …
I brag about the speed of the home inspector website hosting, you need to have the same settings if you want to experience the same features and benefits.
Starting at the top of the page, the first setting is for WordPress. You want to select the basic WordPress installation. (Should be set properly by default) it should be something like “Version 5.8” or whatever the current version number is.
The next section is the name of your “managed app” or to simplify it, the name of your business. Don’t worry about everything being exact. If your official business is Client First Trusted Home Inspections, LLC, then just put in “Client First”. You are going to do the same thing for your “managed server” & “Project”. (This is just for your eyes & tech support, don’t overthink it)

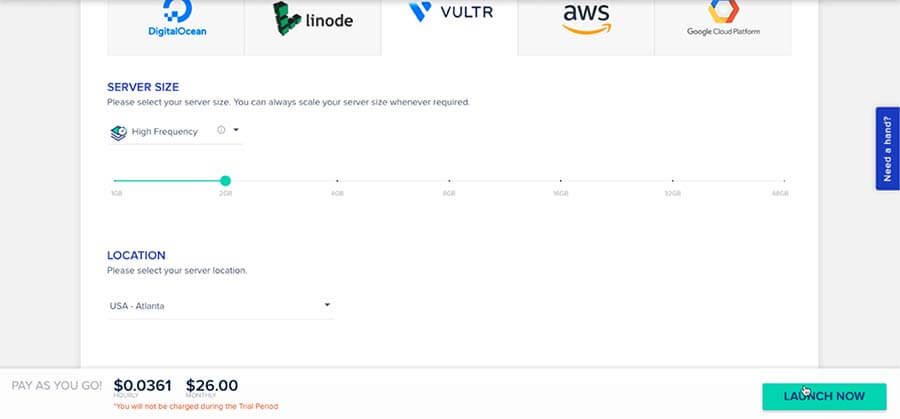
After you have finished the “naming” portion, you will need to pick a server provider. The suggested option is VULTR. So once you get VULTR selected, you will need to go down to the “SERVER SIZE” options. The first thing that you NEED to do here is change the setting from “Standard” to “High Frequency” in the drop-down box.
Next, we’ll setup at the second option or the “2GB” option. (If you continue to grow your website and start to outgrow this “size” you can always upgrade later)
The last step in setting up your server settings is the “LOCATION”.
This is where the server is, that will “host” your files for your website. While the servers are fast, if you select the wrong location, it could slow down your website speed if you live in Texas, and your servers are in London. So be sure to go through the options and select the location closest to you. (or ideally closest to the majority of the people who will be visiting your website)
Take a second to look at the image below and make sure you have all of the settings filled out properly, then click on “Launch Now”
This will automatically take your selections and start setting up your server.
Cloudways Hosting Referral Program
Before you see the full page, you will see a pop-up with a referral program where they’ll credit your account $20 if you sign up a friend with the home inspector website hosting. (Don’t forget to tell them about the “saevusx” coupon code.) You can use this if you want, for now, you can close this and we’ll get back to adding the server.

Cloudways Hosting Server Setup
This process can take a few minutes. (Most of the time 10-15 minutes.) The software is setting up your own private server space and installing WordPress for you. It’s time to hurry up & wait. Grab yourself a quick bite to eat or a drink and come back in a few.

While we wait for that, I want to give you another disclaimer. They do launch this for FREE. Which is an awesome feature, BUT, you need to go through the steps to put your payment information in and upgrade it to the actual “paid” account before the end of the 3 days or YOU WILL LOSE EVERYTHING!
Once the server is added, it will automatically install WordPress on a temporary URL for you. (Don’t worry, you can attach your domain later.)
In order to get to your website, you’ll need to click on the Applications link a the top of the page.

After you get to the “Application Management” page, you will see your application listed. On the page, you can click on the icon on the right-hand side of the screen of the box with the arrow in the upper right-hand corner, and it will take you to the front page of your “website”. As it sits, it is a basic installation of WordPress.

In order to access the back end of your website, click on the name of the application to get to the settings or “Access Details” page.
From the Access Details page, you can also click to go to your website or “application url”.
Inside of the “Admin Panel” you will see 3 things
- Login URL
- Username
- Password
These are not attached to the password you set when creating your Cloudways account. These are created by Cloudways.
Don’t worry! We are almost finished signing up for the home inspector website hosting.

So the first thing you will need to do, in order to access your WordPress Dashboard is click on the URL inside of the “ADMIN PANEL” to pull up your website login page.

Then you just click on the info inside of the “Username” field to copy it. Then paste it into the username field on your login page.
***You can paste by right-clicking in the field and then clicking paste. You can also put the cursor in the field and then hold down the “Control” key & then press the “V” key. ##IF YOU ARE ON WINDOWS## If you are on a MAC then you would hold down the “Command” key & then press the “V” key.
Once you have entered in your username, you will need to do the same thing with the password.
After you have entered in your information, all you need to do is click on the “Log In” button.
And just like that, you are inside of your WordPress dashboard.
But just because you are there, don’t forget that there is more that you need to do in order to not lose your work. So I’d recommend, now that you have set everything up, that you go through and upgrade your home inspector website hosting account inside of Cloudways. You can do that by clicking on the “UPGRADE MY ACCOUNT” button inside of the banner in your account and following the steps to set up your payment information.

Once you upgrade your account, you have officially signed up for your home inspector website hosting account.
Congratulations! YOU DID IT!!!! 🙂
Now, moving forward, be sure to take advantage of the Ultimate Home Inspector Website Template to make the best website possible for your home inspection business.
Please continue to come back to the blog for more posts and training like this.
I hope this has been helpful. I really enjoyed making it for you
If you have any questions about your home inspector website hosting account with Cloudways or anything else you can always shoot us a message on Instagram or Facebook. You can also email me directly if you wish… cj@inspectorbranding.com
See you there!
NOTE: If you are moving your website and testing the Cloudways 3 Day Free Trial, you will need to start off with creating a backup of your current website with a plugin called Backup Migration by Migrate. Then all you need to do once you have your backup is install & activate the plugin on the new site and upload your backup.


